Trim and Safe Areas
The gray borders around the section preview represent the trim and safe areas of your page.
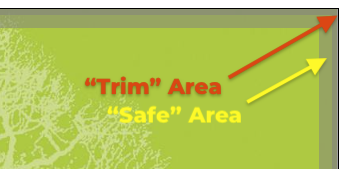
- Trim Area:
- A dark gray border around the section preview represents the trim area. You should not place any design elements within this area, as they will most likely be trimmed off in production. However if you are using an image frame as a background, it is very important that the image goes past the trim area to ensure that there is no white area showing on the edge of your printed book.
- Safe Area:
- A light gray border around the preview represents the safe area. You should be careful with any elements placed within this area, as they will be very close to the edge of the page in the finished book. Keep all text, heads etc out of this area.
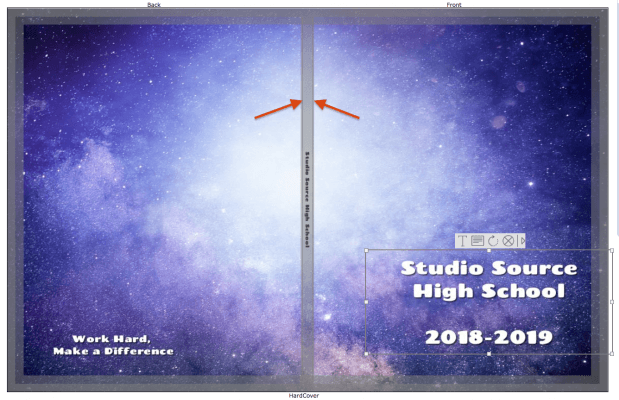
- Spine Text
- Hard Cover and Perfect Bound books can have spine text. The gray area in the center of cover section preview represents the spine. IMPORTANT: Text on can only cover 70% of the width of the spine (the area between the two arrows above).