Advanced Mode Features
Advanced Mode Features
This section describes the features available in Advanced mode; the previous section describes the features in Basic mode. Click the Switch to Basic button at the top of the page to change to Basic Mode.
Advanced Mode Overview

Adjustments for your portrait pages are organized into Portrait Settings, Text Settings, and Flow Settings.
The Save and Load Settings feature allows you to save your current Portrait Wizard settings for later use, or for use in another section.

The Preview at the right shows a live update of all settings, with Page Navigation icons below that show the number of pages in the section you are currently working on.
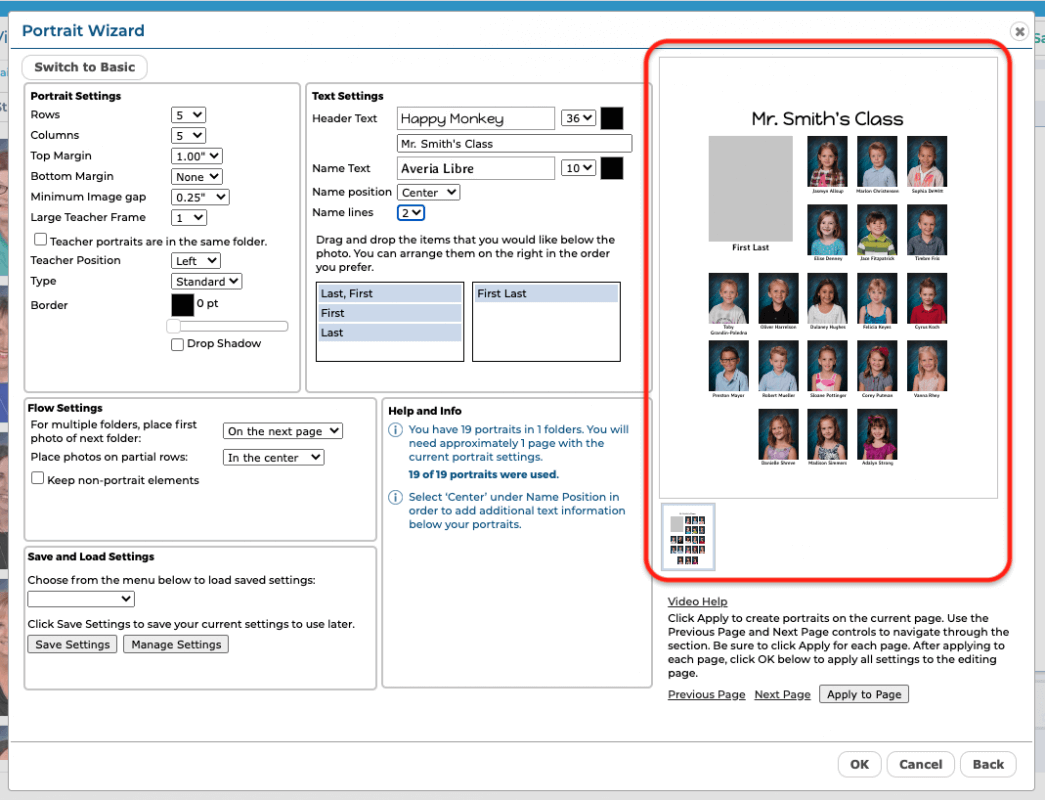
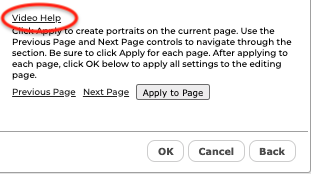
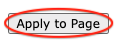
You can apply your current settings to pages in the Preview by clicking the Apply to Page button, which is also located below the Preview. Click the Previous Page and Next Page buttons to navigate through the current section.

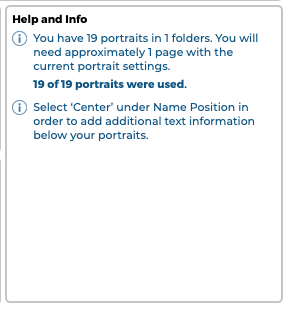
Help and Info appears at the lower center of the dialog, to the left of the Preview. The text at the top of the Help and Info section tells you the number of pages you will need, based on the number of portrait photos you have selected and the current portrait settings. This text will update as you make changes that affect the number of pages required.
Video help also appears below the Preview. Click to watch the tutorial video.
TIP: We recommend that users watch the tutorial video before using the Portrait Wizard for the first time. This is a great way to get started!
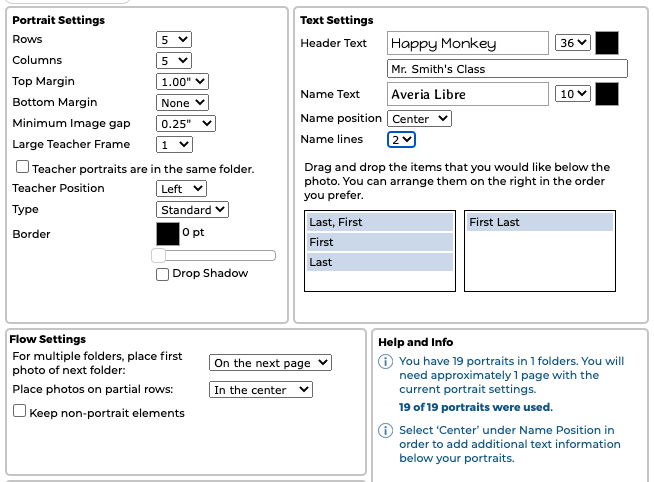
Adjusting the Portrait Settings
The Portrait Settings allow you to define and adjust the layout of portraits on the page.
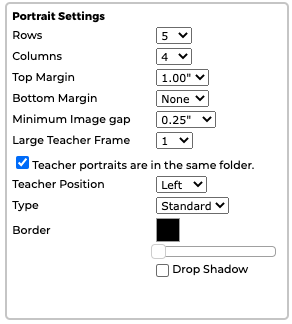
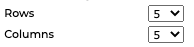
Select from the Rows and Columns menus to specify the number of rows and columns you would like on your portrait page. Note that the number of pages required may change based on this setting.
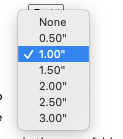
Select a Top Margin setting from the menu to add additional space to the top of the page.
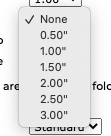
Select a Bottom Margin setting from the menu to add additional space to the bottom of the page.
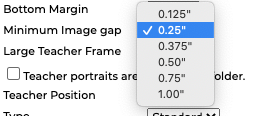
Select a Minimum Image Gap setting from the menu to adjust the minimum amount of space between your portraits. A smaller minimum image gap will bring the portraits closer together, and will result in larger portraits.
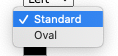
Select from the Type menu to change the shape of the portrait frames between standard (rectangular) or oval.
Drag the Borders slider to add a border to the portraits, and to adjust the thickness of the border.

Click on the color swatch to change the color of the border.
Click the Drop Shadow checkbox to add a drop shadow to the portraits.

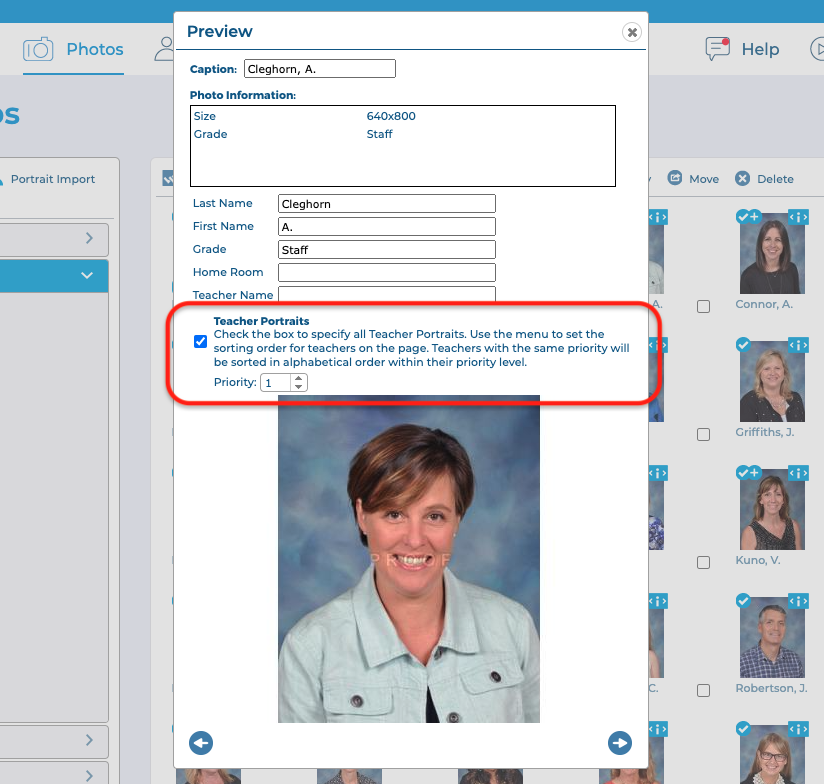
Options for Working with Teacher Portraits
In Advanced mode, you can choose to flow multiple teachers onto the page into large teacher frames, or into smaller frames ahead of the student portraits.
To add larger frames for your teacher photos, select from the Large Teacher Frame menu to add the number of frames you’ll need.
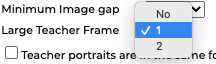
If you do not choose to add larger teacher frames, teacher portraits can just be placed into smaller frames ahead of the student portraits. These teachers will just need to have their priority set to 1 (to appear first), 2 (to appear second), 3 (to appear 3rd), etc. on the Photos page.
TIP: The number of available Large Teacher Frames depends on the number of portrait columns you have available. The maximum number of Large Teacher Frames is 3, which become available with 6 or more columns.
Check the checkbox if teacher portraits are located in the same folder as the student portraits. This will cause the teacher portraits to flow automatically into the appropriate teacher frames.

You can designate which portrait is a teacher and set the order that each teacher appears on the page using the controls on the Photos page.
If your teacher portraits are in a different folder than your student portraits, you can drag and drop teacher photos into their frames from the Photos tab.
While still in the Portraits tab, select the folder where your teacher’s portrait was placed. Find the correct teacher portrait and simply drag and drop onto the teacher frame.
Adjusting the Text Settings
The Text Settings allow you to define and adjust the attributes of all text on the page.
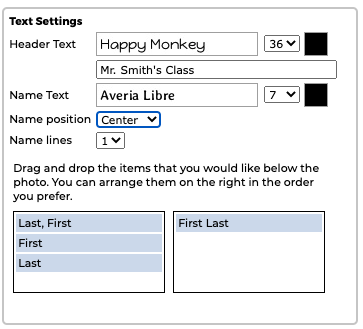
Use the Header Text functionality to add a text header to the top of the page. Type your text into the text box.
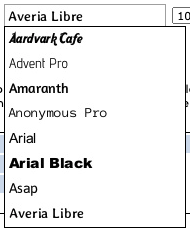
Select from the Font menu to change the font. Select from the Font Size menu to change the size of the text. Click on the color swatch to change the color of the text.

Use the Name Text functionality to adjust the type characteristics of the student names.

Select from the Font menu to change the font. Select from the Font Size menu to change the size of the text. Click on the color swatch to change the color of the text.
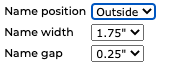
Select from the Name position menu to adjust placement of student names. Select Outside to place the names to the outside of the page. Select Center to place the names below the frames.
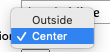
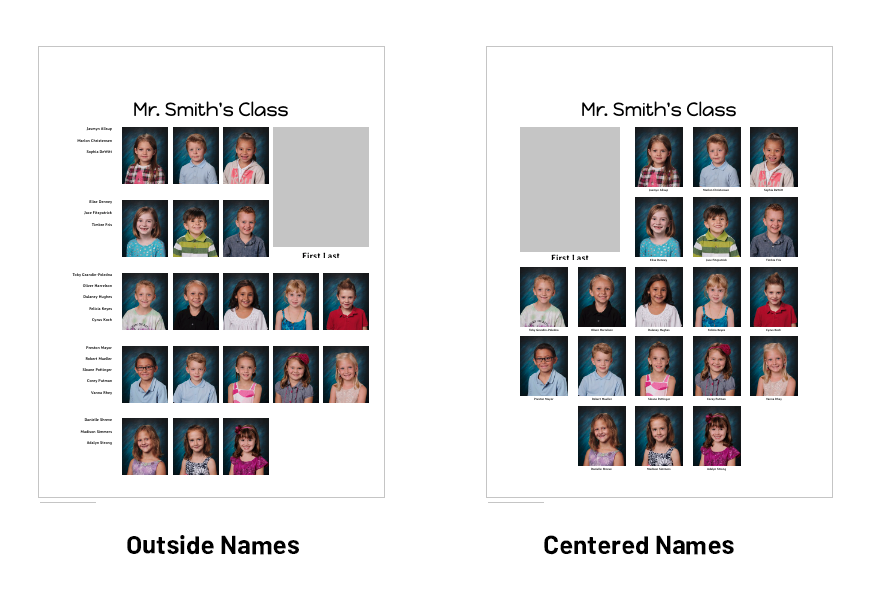
If you select Outside, the names will appear to the left of portraits on a left-hand-page, and to the right of portraits on a right-hand page.
You will see menus to adjust the Name width and Name gap. Change the Name width to adjust the width of the text frames. Change the Text gap to adjust the amount of space between the text frames and portraits.
Select a Name Display button to choose whether to organize student names by Last Name, First Name or First Name, Last Name.

If you select Center, the names will appear below the portraits and you will have some additional flexibility in adding text.
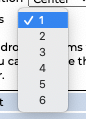
You will see a Name lines menu that will allow you to adjust the number of lines to be used for student names. You can choose to add between 1 – 6 lines of information below each portrait.
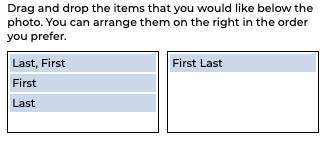
Once you’ve selected the appropriate number of lines, drag and drop the information that you would like to appear on the panel page, from the left to the right.
IMPORTANT! If you see a yellow Alert icon on any of the portraits in the preview, this might mean that the amount of text in the student name will not fit in the allotted space. You may see more detail in the Alert section at the lower left of the dialog. You can adjust the font size, name position, and other settings until all of the names fit properly, at which time the alerts will disappear.

Adjusting the Flow Settings
If you selected more than one folder of photos on the Select Portrait Folders dialog, the Flow Settings will appear, allowing you to determine how to separate the portraits from each subsequent folder, and how you would like a final, partial row of portraits to appear.
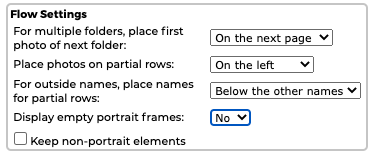
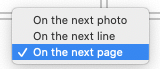
In the menu labeled For multiple folders, place first photo of next folders, you can choose between On the next page, On the next photo, or On the next line. This will allow you to control the transition from one folder of class portraits to the next.
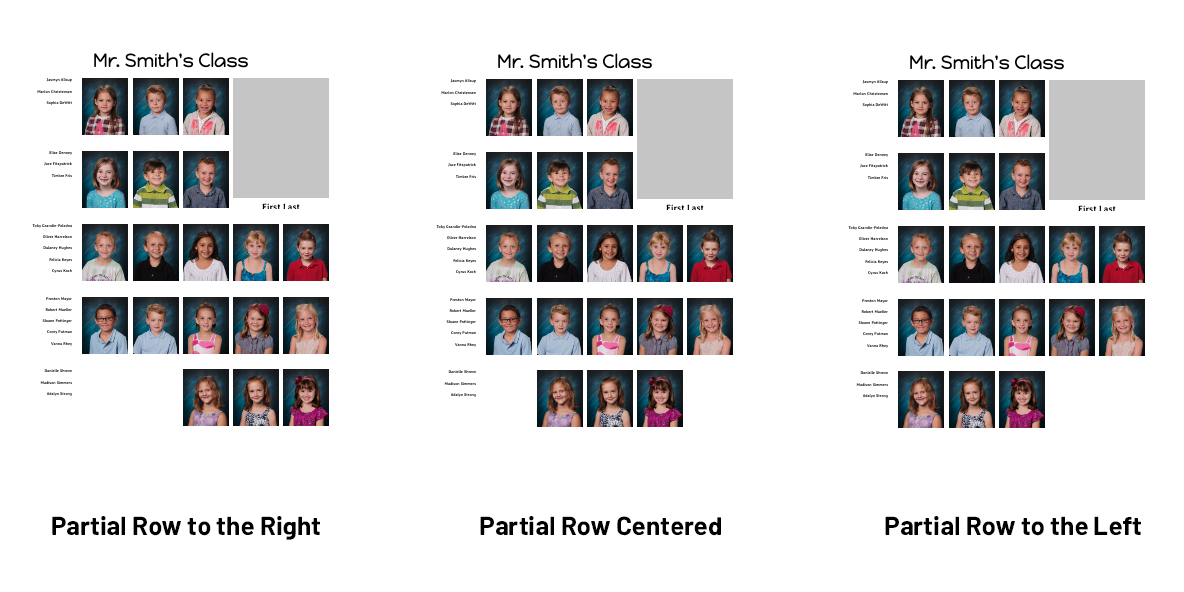
In the menu labeled Place photos on partial rows, you can choose between On the left, On the right, In the center, On the inside or On the outside. This will allow you to control the appearance of the final row of portraits, when it contains less portraits than the rows above it.
In the menu labeled Display empty portrait frames, you can choose Yes or No. This will allow you to control whether or not empty portrait frames should be shown on the page. If you chose to place partial rows in the center, the Display empty portrait frames menu will automatically be set to No.
TIP: We recommend you do not delete empty portrait frames. It is best to leave them in place, in case you need to add additional portraits to the class later. The Display empty portrait frames feature allows you to hide the frames that are unused, but still keep them available in case you end up needing them.
Click the Keep non-portrait elements checkbox to preserve other elements in your page design when changing your portrait layout. If you do not check this box, the Portrait Wizard will delete existing clip art, elements, and floating image and text frames when updating the page.

Alerts

If you see a yellow Alert icon on your preview, this indicates an error on the page. For example the amount of text in the student name will not fit in the allotted space.
Check the Alerts section at the lower left corner of the Portrait Wizard dialog for additional information.

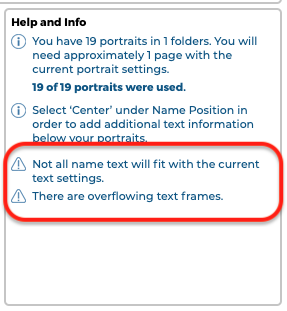
The Alert icon will disappear when there are no issues remaining.
Applying and Saving Settings
Click Apply to page to apply the current Portrait Wizard settings to the current page. Refer to the Page Navigation icons at the lower right to confirm the page you are working on.
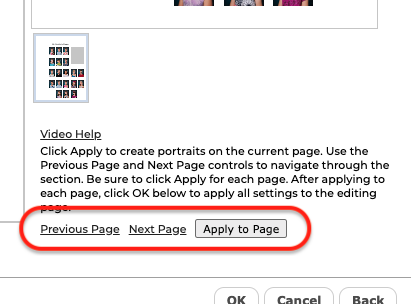
Click on Previous Page and Next Page to move through the pages in the section. Then click Apply to page again to apply the settings to each subsequent page.
Portraits will flow onto the pages automatically as you apply the settings. You can change the settings for a page at any time. Be sure to click Apply to page again to apply any changes.
Saving Your Settings
You can save the current Portrait Wizard settings and then apply them to other panel pages.
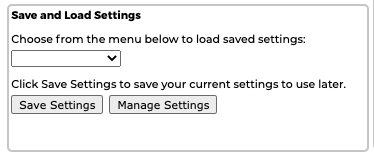
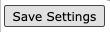
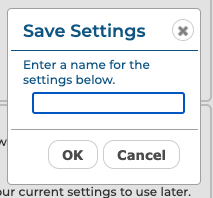
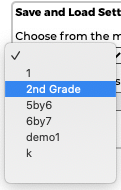
Enter a name for the settings, then click the Save Settings button to save the current settings. Your settings will be saved to the Save Settings dropdown menu.
To apply your settings to another panel page, open the Portrait Wizard, then select your saved setting from the menu.
The Portrait Wizard settings will update. Click Apply to page to apply the settings to the current page.
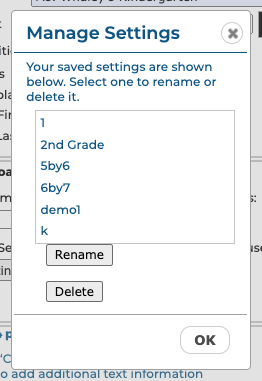
Click Manage Settings to Rename or Delete your saved settings.
Click OK to close the dialog and save your changes. Click Cancel to close the dialog without applying any changes. Click Back to go back to the Select Portrait Folders dialog.
